A few
months back I made my friend a simple tote bag that has since graced the streets
of Rome and continues to be paraded around London to this very day. The
feedback has been greatly encouraging, as apparently the bag is spacious,
strong and the thick handles don’t dig into the hand like thin ones would. As I
mentioned in the blog detailing my first tote bag I suspected I’d end up making a few more for
friends in the future and indeed I have!
 |
| The latest tote bag |
 |
| The original tote bag design |
As with
most of my projects the fabric came first. I spotted this fantastic orange floral fabric that is 1970s inspired and instantly thought of a friend of mine who
is very much into retro chic. With her birthday coming up I thought a tote bag
would be a great place to store the many balls of wool I know she has at home
because she is a keen knitter.
 |
| I loved this fabric as soon as I saw it |
I
selected a pale olive green linen fabric for the outer to complement the
orange patterned print that would be the lining, and ordered two fat quarters
of each along with a matching thread, which wasn’t hard to find. In general the method was the same
as my last tote bag.
 |
| The green linen and snippet of the orange fabric |
Making
the pattern for this bag was very simple, I used a single rectangle for the bag
outer and then folded it in half – adding an extra inch in length – and cut out
two half pieces for the lining. I could have cut the lining as a single piece too
but then the pattern would have been upside down on one side, so it was worth
making the lining from two pieces – for patterns without a ‘right way up’ a
single piece can be used.
 |
| The finished handles |
For the
handles I cut two long, wide rectangles and folded them right side to right
side and did a straight stitch along the long edge before turning the tubes the
right way and top stitching down both edges so that the handles lay flat.
I made the handles slightly longer on this bag than on the previous one so that it can be worn on the shoulder if hands are full of knitting needles/cups of tea/slices of cake, etc. Before I could attach the handles though I had to make sure the body of the bag
was constructed.
The two
lining pieces were put right side to right side (patterns matching) and I
stitched down the long sides and across the bottom. The main fabric was folded
in half long ways (right side to right side again) and stitched down each side,
but obviously not along the bottom as it didn’t need it.
Next came
the tricky bit. I had to put the lining and front fabric together (right side
to right side again) with the handles in the correct position so that I could
sew the handles between the front fabric and the lining, giving a neat finish
once complete. I did a basic tacking stitch to hold the lining, outer fabric
and handles all in the right place before sewing with the machine and then
removing the tacking stitches. I'd tried using just pins last time and it wasn't easy, tacking gave a far more secure way of ensuring everything was in the right place before hitting the foot pedal.
 |
| Tacked and ready to sew |
As usual
while sewing a lining that will be fully enclosed when finished I had to leave a
gap so that once everything was attached I could pull all the fabric back
through before top stitching along the top edge for both strength and to close
the gap.
 |
| Top stitching around the opening |
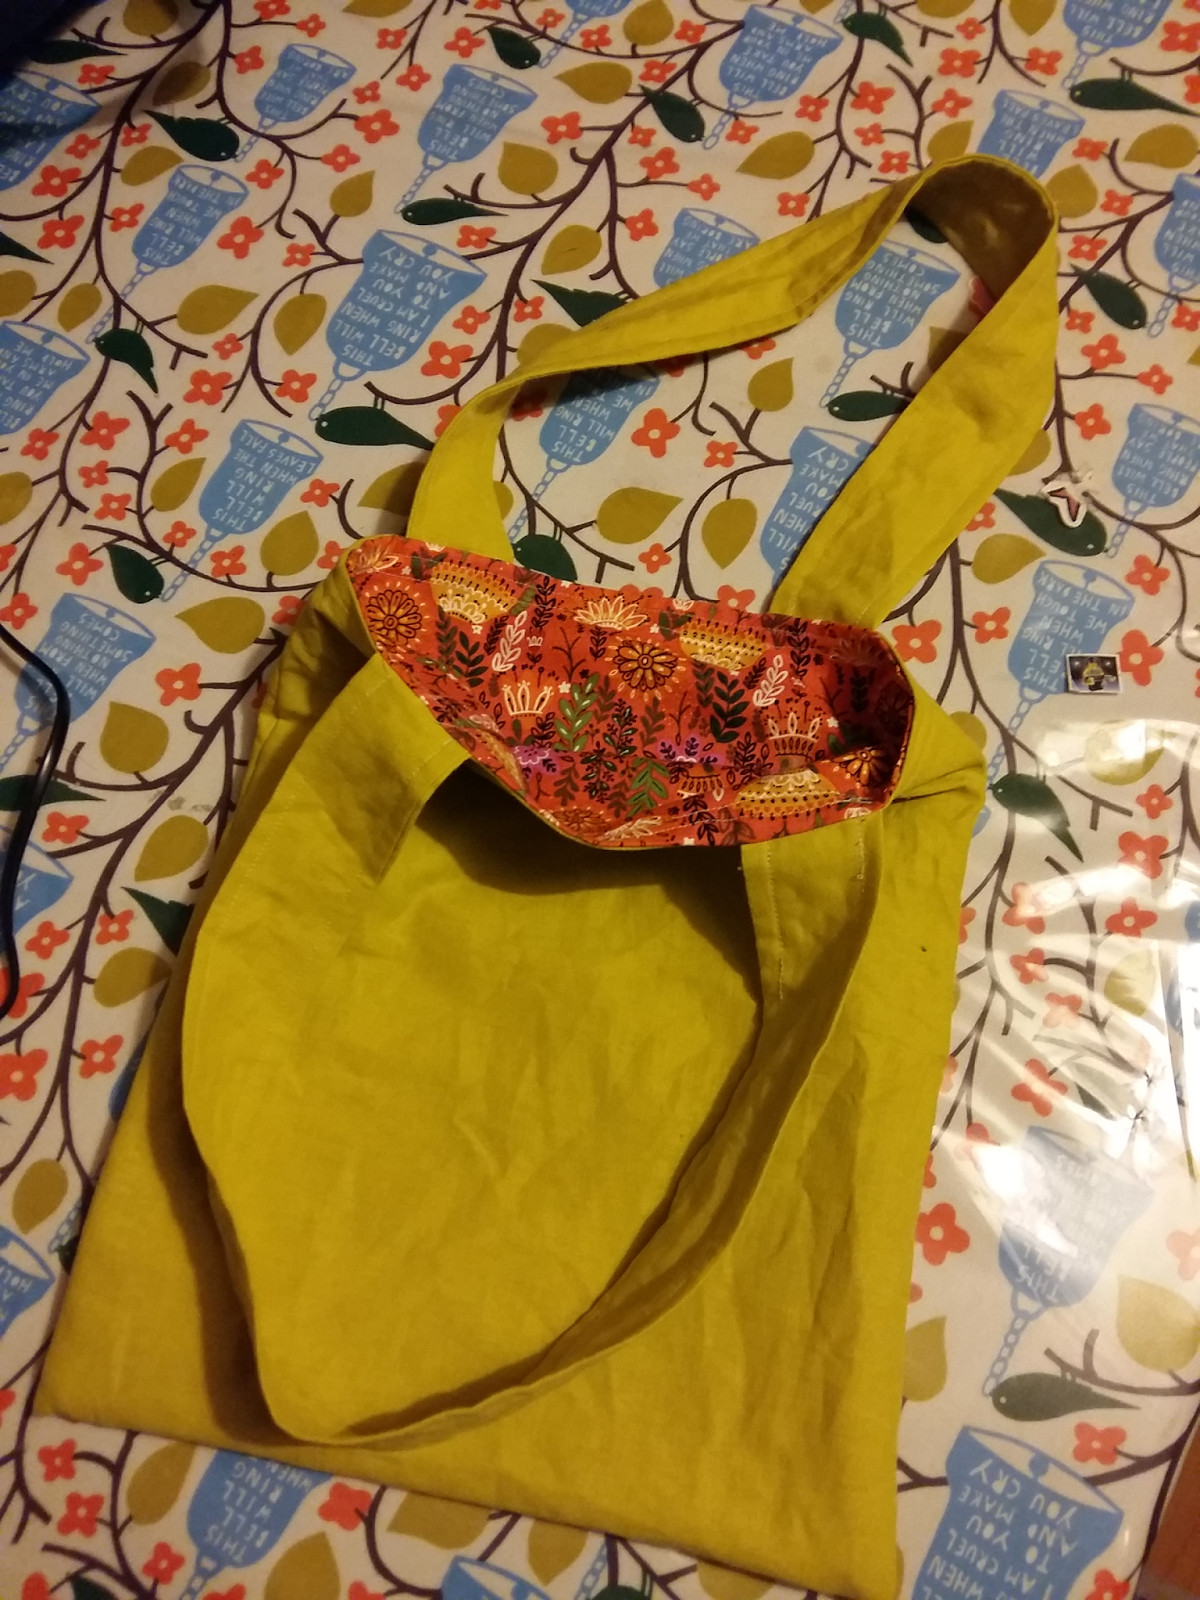
I didn't sew a button onto this bag as a fastening and in retrospect I should have made it like before with the exception of actually sewing two buttons on – one on the inside and one on the outside – to make it fully reversible, because my friend likes the lining so much she
uses the bag inside out! Next time
I make a tote bag I might give it a go, and actually make the handles from both the main and lining fabric too. Guess I just need another friend to have a birthday!
 |
| How my friend uses the bag – inside out! |
 |
| The finished simple bag |
All
blog content and photos are Copyright of Charisse Sayers Proofreader &
Copywriter www.charisse-sayers.com I
welcome all feedback and would love to know your thoughts so please get in
touch, comment, share, like and generally get involved – you can also find me
on Twitter, Facebook and Instagram!


No comments:
Post a Comment